New Year Resolutions Every Mom Should Think About

With 2018 just around the corner, December is usually a month of hectic Christmas and New Year’s Eve planning.

We’re willing to bet that between getting your kids ready for their daily activities, tending to the household, your own job and prepping food, you don’t have much time left to take a breather and reflect on the past year.

And if that’s the case, then we offer seven resolutions you should consider fulfilling starting this January 1st. Make it your credo, your new mantra, a promise to yourself.

Sleep is NOT for the weak

“You can nap when your kid naps” is probably the biggest pile of baloney parents utter. Their kids are either the soundest of sleepers, or they just try to mask the suffering of unslept nights. Most of us wait for the youngest ones to fall asleep so we can tend to other things in the house we can’t do while they’re up. But in 2018, try to slow down your tempo. Leave some things unfinished to catch those half hour worth of Z’s. The world won’t end, even if you think otherwise.

More dates

Remember those? Remember the time when you and your significant other could just go to a dinner and a movie, or just walk down the park and eat those delicious hot dogs in the cool night air? Yeah, me neither. Like an unwritten rule, your love life (and sex!) take a back seat when the kids arrive. But whether you’re a new mom or a true veteran matriarch, fighting to rekindle the fire with your significant other never stops. Do yourself a favor starting this January, and hire a sitter at least once every two weeks to go on a date night.

Sex

Another whopping topic on our list is every mom’s sex life once family cuts in. We tend to neglect intimacy simply due to exhaustion and the lack of mental stimuli (there is nothing stimulating about overdue projects, long work hours or heaps of laundry and kids’ homework). Try and include tiny little signs of affection (such as dirty texts, exchange looks and simply be gentle with each other), and see how you slowly build the much-needed attraction back up.

More you time

By “you time” we don’t mean necessarily going shopping or out clubbing with your girlfriends (although those are welcome, too!) You time can also include reading a good book, watching that movie that’s been collecting dust on your Netflix list, paint your nails, or take a bath. Not only will you feel better, but it’ll also allow for your mind to recalibrate. Be honest with yourself – how long ago did you start forgetting about all that needs to be done throughout the day? This might be just what the doctor ordered to remedy the issue.

Treat yourself

Once a month, just once a month at least, designate a day when you will pamper yourself in full. Visit a cosmetic surgery clinic and get that makeover you’ve been dreaming of the past few years. Or go take a day off at the spa. Buy that small haul of new clothes without guilt – the world is your oyster! This 2018 is the perfect year to work more towards being the best woman you can be, and not only a mom.

Focus on the important

Going down the lane of „always remember everything“ will ultimately drive you insane. We’re expected to keep everything in our head: know where everyone’s socks are, which shelf the cereals are on, if those bananas in the fridge are still good (like they can’t tell themselves!), and much more. Storing a lot of irrelevant information will start to push out the relevant ones, and lead you quicker to exhaustion. So start designating who remembers what around the house, so that you can spend more time focusing on what’s really important.

Reflect

Last, but not least, reflect. Think back on the entire year, and what you’ve achieved. Where could you have done better? What could you have done differently? What was the proudest moment of 2017, and how can you get more of those moments in 2018? Spend more time with your family even before New Year’s Eve, and appreciate them, flaws and all. ‘Tis the season to be grateful for what we have.

In the end

We spend far too much time rushing and running around, thinking we have to be super moms 24/7. But it’s far from true. We’re human, and we need the break humans get, instead of the world on their shoulders, like superheroes. Prioritize yourself sometimes, and it will return tenfold. Stress far less in the next year and don’t fret the little things. Everything will come into place.

How to Create a Kid-Friendly Bathroom

The bathroom is usually the smallest room in the home, but also the most challenging for children. While many parents decide to remodel and adopt using child-sized fixtures, experts advise homeowners to think twice before going Wayne Szalinski. Unless resale is not a concern, it’s better to build a bathroom for adults and make it child-accessible and decorate it with playful themes and bright palettes. Here are some tips to make your bathroom kid-friendly.

Safety first

With the little feet dashing to a bubbly bath, jumping and hopping even in the bathroom, small ceramic tiles with lots of grout lines provide better traction than big ones. To prevent accidents, look for bathroom tiles that have a coefficient of friction greater than 60. The value is usually listed among the product technical information on the tile packaging. Although these anti-slip tiles may be harder to clean, they are a valuable protection measure that is also helpful for seniors.

Furthermore, humidity is also an important aspect and should be well maintained in the bathroom to ensure there is no mold growth which is dangerous to the little one. So maybe adding a dehumidifier in the bathroom would be a good choice in keeping your kids safe.

Safety first – Photo by joel carter

Can’t reach this

Look through your child’s eyes while creating your bathroom design. As they grow they’ll be gaining independence and will want to reach everything themselves. A sturdy step stool will surely see a lot of use for brushing the teeth, washing the hands and even getting in and out of a deep soaking tub. You can even make a DIY step platform out of a wooden pallet that rolls on small casters, so when the ‘grooming’ is done, the child can roll it back under the vanity. Consider a lower shelf, mirror and coat hooks for the kid’s towels, toothpastes, brushes and shampoo, and save the high shelves and cabinets for shaving supplies and flu remedies.

Can’t reach this – Photo by 5712495

Two’s a crowd

The all-too-familiar childhood memory of kids elbowing for the faucet can easily be avoided if you use a big 48-inch wall mounted trough sink. Such a fixture has enough elbow room for two, even three kids to brush their teeth at the same time, which is indispensable in morning hours when everybody is getting ready for school or work. They usually come in cast-iron models, so you can easily paint the bottom with an accent colour to match the room décor.

Use and store away

Teach kids responsibility for their belongings with personalization. Storage buckets, toiletry bags, towels and products that feature their name will give them a sense of ownership, and encourage them to keep those items neat and clean. You can match towels in different colours each with your kid’s initials to keep the bathroom style rounded up. Rather than storing them in a linen closet, consider using open shelves, woven baskets or even a simple wooden chair to store kids’ towels. This way they’ll always be accessible and also become a part of the room décor.

Use and store away – Photo by jarmoluk

Water-inspired themes

Choose an ocean-inspired theme for any room of the house and your kids will love it. Boats, sailors, divers, mermaids, pirates, dolphins – plenty of fascinating things going on between the waves. Still, beyond the seven seas there are plenty of other favourite themes – cars and trucks, zoo animals, bright blossoms, fiction characters. You don’t have to think hard about a theme that your kid will love for many years to come. As their taste changes, you can easily update towels, curtains and other linens.

Playful colours

The bathroom is a space where bright colours and bold contrasts mix well, so you have a free hand to experiment with your child’s favourite primary colour. Since quality bathroom supplies are usually white, they create a fresh backdrop for colourful towels, shower curtains, floor mats and accessories.

Rather than small-sizing everything, try to make the bathroom a kid-friendly environment by catering to their tastes and interests. Years and years of remodeling is expensive, so focus on décor and education, and other ways of making adult bathroom amenities accessible and safe for children to use such as using modern sinks for bathrooms.

Claire is a personal and professional development expert who believes that a positive attitude is one of the keys to success. You can find her online writing and giving tips about lifestyle and development as a regular contributor at highstylife.com. Feel free to reach her on Facebook and Twitter!

Eco-Friendly Ways to Decorate for the Holidays

The holidays are a time when you focus on peace and of course, celebrations. However, most holiday decorations eat up energy, consists of using dead trees and are clearly bad for the environment.

That is as far from eco-friendly as you can possibly get right? Finding a sustainable yet beautiful Christmas decoration collection is no easy task. Well here is some good news! I want to let you know in this post that you can decorate for the holidays in ways that are considered to be eco-friendly.

Below are tips on how you can do that:

Use LED Candles

Flickering candles definitely create a festive atmosphere and people love them, however, they are dangerous when kids and pets are around, not to mention they can aggravate allergies.

Therefore you can still have candles but without those risks. You can have those lightweight, reusable LED candles that are made of real wax and are even meant to flicker the same way as traditional candled- but without the messy wax, flame and smoke!

Therefore, they are environmentally friendly and much safer for your lungs. And the indoor quality won’t be affected either. You also don’t have to worry about your home burning down! LED candles are a win-win when it comes to being eco-friendly for the holidays and creating a festive atmosphere.

LED Holiday Lights

Incandescent lights use up a lot of electricity, they burn out and break, don’t last long and are expensive. Therefore, they can be a frustrating part of preparing for the holidays. At the same time, without lights, the holiday spirit is lacking!

The great news is that you can use LED lights instead because they use quite a bit less electricity, they last longer, they don’t break or burn out and save you a lot of money!

They are also very nice looking as they come in a variety of colors. They also are inexpensive, and more and more people are using LED lights over the incandescent ones.

Interesting Challenge Coin Decoration

Coin displays are a unique retirement gift or a rewarding gift and an impressive way to say thank you for your exquisite efforts.

Perfectly designed challenge coins in a nice stand can make your memories live forever and will make your house look pretty in the Christmas time as well.

Create Wreath Out of Fabric

Many wreaths require you to cut off tree branches to make them. However, you can be creative and find an eco-friendly way to make wreaths instead.

For example, you can make a wreath by using old scraps of fabric and they are not necessarily hard to do. All you have to do is get creative. You can also go to craft stores like Michael’s to see what other eco-friendly parts you can get to make a wreath.

Faux Cedar Centerpieces

If you use real pine centerpieces, you know you are killing and injuring trees, at the same time if you get faux pine centerpieces- you are getting decoration that is made out of toxic material which can give off harmful dioxins.

Therefore, both of those options are not good for the environment. The good news is that you can have an eco-friendly pine centerpiece on the table. This kind of cedar pine centerpiece is made from PE or polyethylene, and it is safe, recyclable and looks identical to the traditional types! Not to mention, it is reusable!

Recycled Cardboard Christmas Tree

Recycled cardboard Christmas trees are incredibly eye-catching, even more so than the real tree. This way no new trees are being killed and you can buy them in green or white. They can be decorated with paint, crayons, and paper. These are much better than the alternative.

If you are trying to live a more eco-friendly lifestyle and you have been concerned that you couldn’t maintain this lifestyle during the holidays, now you know you can! Have fun and have a happy, safe and green holiday!

Pros and Cons of Using Dry Shampoo

With extra care needed and less time left in the day, various innovative solutions have been introduced to make things more manageable. From packaged food to blow dryers, there are many things available that offer an instant solution to various problems.

One such amazing solution for hair care is ‘dry shampoo.’ If you still haven’t tried this wonderful hair care solution then let me tell you more about what is dry shampoo and why using it can be really great for your hair!

Dry Shampoo – What Does That Mean?

Dry shampoo is dry in nature and this is why it has got this name. It does not contain any liquid or semi-liquid texture.

It is available in a powder form that can be sprinkled on hair and massaged into the scalp. Once you begin massaging it into the scalp it will get absorbed by the hair and the scalp. You then have to wait for 2 – 5 minutes to let the shampoo absorb all the oil, dust, and grime from the scalp.

After 5 minutes you are good to go!

Hence, no need for water and no waiting for your hair to dry. So, if at any moment you want a quick fix solution for your bad, oily hair then dry shampoo is an excellent and convenient way to go.

But like most of the things, even dry shampoo comes with its own pros and cons. So, if you are amazed by the convenient solution dry shampoo brings to you then it is essential that you first have a look at its pros as well as cons.

Pros of Dry Shampoo

  • If you are out of time and don’t have enough time to wash your hair with water, liquid shampoo and then wait for your hair to dry then this is by far the best solution.You just have to sprinkle it on your hair and massage it on your scalp. Just wait for one minute and get refreshing and oil-free hair.
  • If excess hair oil is a major problem then dry shampoo is just perfect for you. You no more have to wash your hair every second day with water and liquid shampoo. You can skip washing your hair as dry shampoo would extract all excess grease from the hair as well as scalp.
  • Excellent convenience is another benefit of dry shampoo. Whether you are at home or traveling somewhere, you can treat your hair in just one minute with dry shampoo.
  • If you had your hair styled and want the look to stay longer then dry shampoo is by far the best solution. You can use dry shampoo the next day to maintain that salon-styled look for another day.
  • Also, it is an excellent way to take care of colored-treated hair. Dry shampoo does not result in color fading and loss as much as with regular shampoo. Hence, if you have colored hair then you can always skip excessive shampooing by treating your hair with dry shampoo.

Cons of Using Dry Shampoo

  • Not everyone can use dry shampoo. Those having dry hair, dandruff or scalp irritation problem must avoid using dry shampoo. It is because it can actually make things worse for them.
  • If you opt for a low-quality dry shampoo, it might leave a whitish or dusty residue on your hair. This residue is sometimes visible. Hence, the best way is to use dry shampoo only once in a week and in an appropriate amount.
  • Make sure you use only high-quality dry shampoo from a reputable brand. There are low-quality shampoos available that may contain ingredients not good for your scalp and hair. Even this may result in additional problems such as scalp irritation, hair fall, dry hair, and more. So, you can combat this limitation by ensuring that you only use a high-quality shampoo.If you need help with hair fall problem, take a look at this awesome Indian hair care blog.

Wrapping Up

Dry shampoo comes with lots of conveniences. But if you will compromise on quality then it can affect the good health of your hair and scalp.

Hence, if you want to enjoy all the benefits of a dry shampoo without experiencing problems then switch to dry shampoo from a good brand!

31 Days of March Crafts for Kids

The month of March is a busy one that offers plenty of craft potential. Moms, daycare providers, scout leaders, and others who want to plan enjoyable activities for kids can choose from the coming of spring to Dr. Seuss Week to St. Patrick’s Day to religious holidays such as Easter and Passover as the theme for 31 days of crafts. Fortunately, bloggers have documented loads of fun ideas for kids of all ages. We have attempted to pull out some of the most interesting craft choices.

When you click through too many of the crafts on our list, you will be directed to additional related crafts.

Celebrating The Key Themes Of The Month

Children’s author Dr. Seuss was born on March 2, so his birthday is the reason for a week-long Read Across America celebration. Crafts inspired by some of his most popular stories are a good way to bring his catchy rhymes and intriguing tales to life.

  1. The Shape of Me Dr. Seuss Mural
  2. Suess Hats
  3. One Fish Two Fish Dr. Seuss Craft Origami Fish
  4. Lorax Toilet Paper Roll Craft For Kids
  5. The Cat in the Hat Clothespin Craft!
  6. Horton Flower Pots


Spring arrives on March 21, but the whole month signals the start of spring crafts rather than winter themed ones,

  1. Bumblebee Toilet Paper Roll Craft
  2. Rainbow Pour Painting
  3. Butterfly Coffee Filter and Egg Carton Craft
  4. Bluebird of Happiness
  5. Spring Tulip Bouquet
  6. Spring Handprint Card


St. Patrick’s Day on March 17 is a favorite day that many people like to celebrate with parades, parties, and crafts.

dog

  1. Shamrock Puppy
  2. Pot of Gold Craft
  3. Shamrock Mask
  4. Rainbow Shamrock Garland
  5. Button Rainbow
  6. Leprechaun Hats


While the dates for Easter and Passover change each year, in 2018 Passover starts on the evening of March 30, while Easter lands on April 1. Each holiday has a deep religious meaning that can be imparted to kids through crafts. Children of all faiths can learn about other cultures, while Jewish and Christian children can learn more about their own faith.

rabbit


Easter crafts are often an extension of spring-inspired projects.

  1. Egg Suncatchers
  2. Tissue Box Bunny
  3. Make Your Own Easter Egg Magnets
  4. Magic Color Scratch Easter Cross
  5. Lamb Easter Egg
  6. Bunny Party hats
  7. Popsicle Chicks


Passover crafts center around the riches tradition of Judaism.

  1. Felt Seder Plate
  2. Simple Origami Jumping Frogs
  3. Lego Seder Plate
  4. Moses Parting the Sea
  5. Elijahs Goblet
  6. Passover plagues finger puppet craft

Bonus crafts

  1. Labeling your children’s school items
This will increase the chances of any lost items being found. According to a recent study children loose more than one thousand items during their scholastic years. Name labels also encourage
your kids to learn how to read.

Conclusion

By splitting the month of March and the themes, you can give equal time to all there is to celebrate in this month. If your school closes for spring vacation sometime this month, many of the crafts on the list are excellent for moms to use at home to keep the kids occupied.

31 Days of January Crafts for Kids

Once Christmas and Hanukkah have passed, kids in many parts of the country are plunged into a cold, snowy January. When it’s too cold to play outside, boredom sets in and moms need a variety of projects for preschoolers and early elementary school kids to do. There are only so many videos to watch, plus it is good to do projects that encourage creativity, develop skills in coloring, cutting, painting, pasting, and more.

Snowmen And More

snow

Even kids in warm states are fascinated with snowmen, so many crafts focus on different ways to make them, However, there are many other choices in case you are saturated with crafts centering are around frosty little people. Martin Luther Day is in January too, so we have included several crafts that promote awareness of his focus on having personal dreams and a vision for a peaceful society. The Friends Around the World craft uses paper dolls that you can use for many other projects.

Most of the projects on the list can be accomplished in an hour after nap or school. The results can be probably displayed on the refrigerator, in your child’s room, and other places throughout the home, and as the projects pile up, some can make their way to grandma’s or auntie’s house. When the project results in a making game, such as Snowman Bowling, your child will have ongoing fun from the project.

The supplies for the project might be things you already have on hand, but by perusing the various crafts, you can start building a list of what to stock up on the next time you are at your favorite craft store or order online (see an example shop here).

A Month’s Worth Of Crafts 

We have listed 31 projects, one for each day of the month, and provided a link so you can obtain the directions. Some projects are better for older kids, but we have listed a variety of choices. For more projects, Pinterest is a gold mine. There are also plenty of individual blogs that you can find by simply Googling “winter crafts.” You can even find them by age.

  1. Salt Paint for Toddlers: An Icy Winter Scene
  2. Toilet Tube Bird Feeder
  3. Marshmallow Igloos
  4. Sparkle Snow Playdough
  5. Cardinal Craft
  6. Footprint Penguin
  7. Toilet Tube Penguins
  8. Waterless Snow Globes
  9. Bubble Wrap Winter Trees
  10. Mitten Craft
  11. Glittery Glue Snowflakes
  12. Borax Snowflakes

13.   Pipe Cleaner/Fuzzy Stick Snowflake Stamping

  1. Handprint Snowflakes
  2. Snowman Bowling
  3. Sparkle Snow
  4. Sock Snowman
  5. Snowman Shape Matching
  6. Snowman Milk Jugs
  7. Doughnut Snowmen
  8. Egg Snowmen
  9. Snowmen Pretzels
  10. Fruit Snowmen
  11. Snowman Family Button Craft
  12. Sparkly Snowdough Men
  13. 5 Little Snowmen Finger Puppets
  14. Popsicle Stick Snowman Magnet Craft
  15. Peace Doves for MLK Day
  16. Friends Around the World Circle
  17. What’s Your Dream Craft
  18. Martin Luther King Handprint Poem
  19. Make A Commemorative MLK Stamp
  20. How to make a stumpery

What other projects have you found to do with your kids in January? Please share in the comments below.

Easy Dr. Seuss Hats

March 2 is the birthday of famed author Dr. Seuss and many elementary schools celebrate it as part of Read Across America week. How better to celebrate it than by making a hat like the one the Cat in the Hat

If you have young children or beginning readers, you know that Dr. Seuss books are a popular favorite. The books present clever stories that are enjoyable for adults to read to kids, intriguing for kids to listen to, and full of opportunities to develop skills in young readers. Babies and toddlers benefit from hearing the stories, which promotes brain development, speech skills, and bonding between parents and children. Some stories are available in durable board books.

What Kids Learn From Dr. Seuss

The books help new readers master phonics by helping children connect letters and sounds that make words and sentences. Because Dr. Seuss boundaries include repetitive sounds, a new reader comes away with the new skill after reading favorites like Cat in the or Hop on Pop. Even kids who do not like to read enjoy the entertaining rhymes of Dr. Seuss.

Beyond the kitschy rhymes, Dr. Seuss stories offer life lessons about responsibility, friendship, creativity, gratitude, and a whole lot more. It is no wonder that schools not only celebrate his birth and achievements every year but encourage kids to dress up for Dr. Seuss week.

book

The most popular costume for this week is the famous red and white hat worn by the Cat in the while there are many variations on this project, depending on the age of the child, but paper plates and construction paper can do the job. They are perfect for kids to wear while reading Dr. Seuss books in school and at home.

What You Need:

  • Red and White construction paper
  • Paper plates
  • Scissors
  • Glue
  • Stapler

How To Do It

  1. First, prepare to make the hats by cutting large sheets of red construction paper lengthwise into two-inch strips. Older kids can do the cutting themselves. You can also make white strips on a red construction paper background.
  2. Cut out the middle circle of a paper plate.
  3. Show kids how to spread the red strips parallel to each other on a large sheet of white construction paper. The result should be a red and white stripe effect. Once strips are in the right position, glue them to the white paper.
  4. After the glue is dry, roll the hats into a cylinder and fit it inside the circle. Staple the cylinder in several places.
  5. Cut 2 inch slits around the bottom of your paper cylinder and then bold and under the rim of the paper plate. Staple the ends to the plate. Fold them under the rim of the paper plate and staple them to secure each hate.
  6. If the kids will be wearing the hats for a while, punch holes in each side of the plate and thread with yarn to make ties.

This project is manageable even by preschoolers, but with more adult help children can make more advanced versions, for example, here’s a version with pop up cats. You can also make the hat from felt.

How does your school celebrate Dr. Seuss week? Let us know in the comments below

Build a Sturdy Diaper Cake for Baby Showers and New Mom Gifts

Trying to think of a baby shower gift that is practical without being boring and creative without being useless? A diaper cake fills the bill on both counts. What’s great about this type of gift is that you can customize it to include a variety of baby necessities in addition to diapers while changing the theme and the color. You can even customize it based on how much you want to spend. The simple list diaper cake will be literally diapers, while a more extravagant one can have clothes, baby paraphernalia, and toys inside it or adorning it. It is also an enjoyable adult craft.

diap

The challenge in making a diaper cake is to have it sturdy enough to stay together, especially during the process of transporting it to and from the shower. The last thing you want is for your hard work to be reduced to a pile of diaper rolls before you arrive at the shower and allow the expected mother and other guests to properly and over your handiwork. Here are some tips for making a masterpiece that is quick, easy, and sturdy

You may have seen cakes where each diaper is individually rolled and secured with a clear elastic band. That not only takes time for you, but requires that the new mom unfold each diaper before she can use it. The method described here is one you can do in an hour, perhaps why your baby is napping.

What You Need:

  • 3 toilet rolls
  • 1 wrapping paper roll
  • 1 10″ cardboard cake circle (although a 12″ is better)
  • 2 packages of size 2 Pampers Swaddlers (Pampers work best because they are white on the outside, but you’ll notice you can use a generic brand on the inside of your cake)
  • 1 roll of 1/2 inch ribbon
  • 1 roll of 1 &1/2 inch ribbon
  • 3 paper clips
  • Hot glue gun
  • Crinkle paper
  • Silk decorative flower
  • Large rubber bands

You can find the supplies for this cake at a craft store or even your local Walgreens or Walmart. If you decide you like making this gift well enough that it will be your standard gift for all your friends are having babies, you can stock up on the essentials when they are on sale.

Making The Cake Base

Cut the wrapping paper roll ½” shorter than the height of three toilet paper rolls stacked together and glue it to the center of the 10″rest cake circle so it won’t poke out the top of the cake.

You can also use a baby bottle or container of baby shampoo or powder as the center, but the paper tube makes the cake sturdy and easy to assemble or disassemble as you created and decorated.

Making The Layers

As the stand dries, you can prepare the layers of the cake. Size 2 diapers work best for these cakes; the new mother can enjoy the cake as a nursery decoration for a while for taking it apart to use the diapers for her newborn. You can, however, use whatever size you want. While any brand works, the whiteness of Pampers makes them especially appropriate for these cakes.

Once the stand is dry, you can begin rolling the diapers around a toilet paper roll and holding them in place with rubber bands. As you add more diapers, you can stretch the rubber band out the next diaper in place. Your goal is to overlap them so that the leader looks uniform. You will probably need about 30 diapers for the base. What you can add more, this number looks great and is manageable if you are new to the world of diaper cakes. If you have diapers with patterns on them, sure to use them on the layers closer to the wrapping role so that your exterior

With a little patience, you should be able to create a stable layer. This is easily a one-person job, although a second pair of hands won’t hurt.

To make the next layers, just repeat the rolling process around a new toilet paper roll. You should use about 20 diapers for the middle layer and 10 diapers for the tops. Your goal is to make a cake that is tiered like a wedding cake.

Assembling The Cake

When you have made your three layers, can see a cake come to life before your eyes. Carefully slide the toilet paper rolls on the main shaft formed by the wrapping paper roll.

When the cake is all diapers, you can make it look festive by placing a layer of crinkle paper between each layer. You can also use scrapbook paper, but the crinkle paper is an easy option that also looks festive.

If you are planning on decorating the layers with ribbons, you can either do so before you assemble the cake or once it is altogether. Just wrap the ribbons around the cake, over the rubber bands you used to keep the diapers in place. Overlap the end using paperclips or none. You can fasten the ribbons with paperclips and a hot glue gun Make sure to avoid getting any hot glue on the diapers by placing your finger between the ribbon and the diapers prevent seepage.

Decorating Your Cake

One beautiful and easy decoration you can use to top the cake is a large artificial flower, such as the hydrangea. Cut the stem so it is the same length as the wrapping to and just place the flower in the tube.

At this point, your creativity can go wild. You can top the cake with a stuffed animal. large rattle, or other decoration, while adding baby supplies to the outside of the cake. Travel size lotions, powders, and soaps, baby utensils, pacifiers, and other small items will end to the appeal of the cake.

Finishing The Cake

Rolled up bibs and onesies rolled around the base of the cake will make a cake contents even more practical. You can also place a brightly colored tutu around it as well.

When complete, take a minute to enjoy your completed craft and then you’re ready to go off and share it. you will have created both a functional gift, an attractive centerpiece, and a host of memories for the new mom.

Thanks for visiting our blog! If you have comments on the date for cake. We have created or you have ideas of your own, please share them below in the comments.

20 Exciting Relay Races for Kids

Throughout the year, relay races are a fun way for kids to run off extra energy. They are particularly popular in the summers at picnics, back yard barbeques, and camps, but relay races always hold kids’ interest. While many races are best played outside, there are variations that are fun inside. A plain race makes for healthy impromptu exercise, while others require more preparation that add another layer of fun.

kids

Preparing For Relays

Here are some things to keep in mind when organizing and preparing for a relay race:

1. Decide on the best location for the race, whether it is inside or out. Races that involve water or lots of space are better outside activities.
2. Remove unnecessary obstacles from the race course, while selecting a safe area to hold the race.
3. If necessary, demonstrate how the race is to be played. Young children in particular need visuals.
4. You designated turning point, which you can mark with a pole or some other landmark you have set up.
5. Make sure to have plenty of water on hand for players to drink on hot days.

Many races require coordination, teamwork, and ability to follow instructions in addition to speed, which makes them a good way to impart these skills to young children. Here are some examples of popular relays that appeal to kids from pre-school on up. Some include an element of silliness that adds to the fun. For all of the races given below, the team that successfully completes the task versus the way.

20 Fun Relay Races For Kids

1. Sack Race – Kids get in a potato sack (or a large pillow case for younger kids) and hop to a designated turning point and back. When they reach the starting line, the runner gets out of the sack and hands it to the next person in line. The winning team is the one whose team members complete the task first.

2. Over Under, Over Under – Before the running starts, kids on each team pass a bean bag or small ball under their legs and then over their head to the next person in line until the beanbag gets to the end. The last person runs to the front of the line and the process of passing over and under continues until the person who started first is once again at the front of the line.

3. Shoe Hunt – Before the game starts, members of each team remove a shoe and put it in a large pile. One at a time, a member from each team runs to the pile to find their own shoe. The first team to have every member find their shoe is the winner. This type of race is particularly fun for a large group.

4. Preparing For A Race. Preparing – The goal of this race is to have each member of each team carry an egg on a spoon from the starting line to a turning point and then return back, so that they can pass the egg and spoon to the next person in line. The winning team has all members complete the task. If someone drops the egg, they need to return to the starting line and try again. The game can be used with hard-boiled eggs or plastic eggs or even golf balls or pennies; older children can even be required to carry the loaded spoon in their mouth.

5. Balloon Pop – Each child races to a chair with an inflated balloon. Once they get there, they put their balloon on the chair and pop it. (For young children, the noise might be frightening; popped balloons can present a choking hazard.)

6. Water Balloon Toss – On each team, the children pair off and are given a water balloon. They toss the balloon back and forth; for each successful pass, they take a step back so that they are further and further away. They continue this process until only one remains with an un-popped balloon.

7. Super Soak – The kids and each team line up between an empty bucket and one filled with water. The person at the head of the line soaks the sponge in water and passes it over their head to each person in line until it is in the hands of the person before the empty bucket. That person squeezes the sponge and runs to the front of the line start the process again. After a time limit of about five minutes or so, the winning team is the one that has the most water in their bucket.

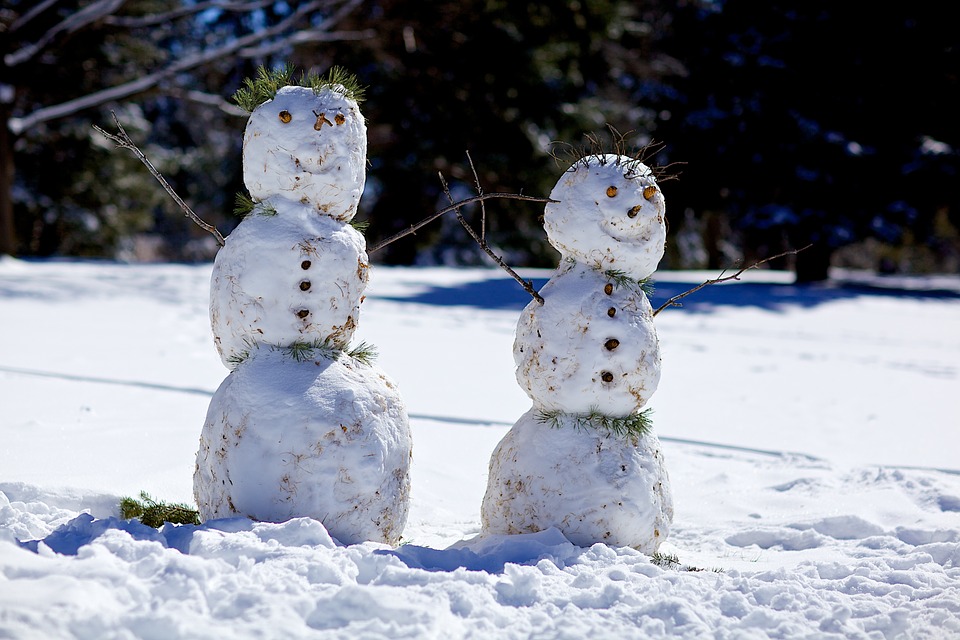
8. Snowman/Mummy Relay – The goal of this game is to wrap another member of the team with toilet paper to create a mummy or snowman. To start out, each member of the team gets a roll of toilet paper. They are timed, and the winner of each round is the person who has used the most of his roll of toilet paper to cover their teammate.

9. Dizzy Bat Relay – Though this race is called dizzy bat relay, the person who gets dizzy is the team member who is up! Each team member runs to pick up a bat. After placing it on end, they place their forehead on top of the bat and spin themselves around the bat 10 times. Then, a bit disoriented from the spinning, they will race back to the starting line to take the next person in line.

10. Quick Change Relay – A member of each team runs to a pile of clothes and puts them all on. He races back to the starting point and removes all the clothes so that the next person can put them on. This child runs to the turning point removes the clothes, races back to the starting point, and tags the next person. The process continues until each person on the team has dressed and undressed. The first team to have everyone complete the process wins.

11. Waiter Run – Like a waiter in a restaurant, each team member for this game carries a plate with a ping-pong ball atop it above their head. They must carry it to a designated spot, turn around, and carry the plate back to the starting point for the next person is awaiting it. If they drop the ball, they must stop and put it back on the plate, while taking no steps.

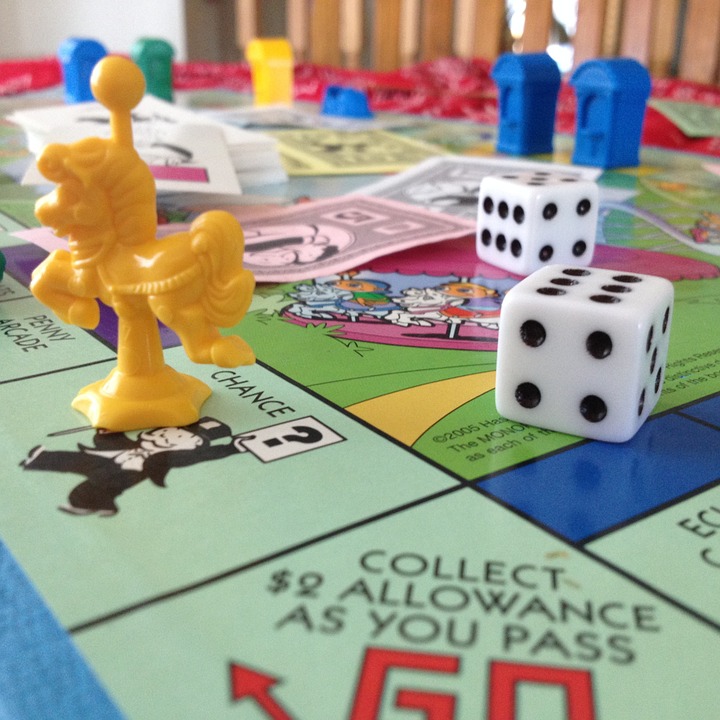
12. Penny Relay – A variation on the egg relay, the penny relay uses a penny on a spoon that contestants must carry from the starting line, to a turning point and back again before passing spoon onto the next contestant. If they drop the penny, they must stop and put it back on the spoon before continuing.

13. Chicken Egg Drop – The object of the race is to carry a tennis or beach ball to a box located a distance from the starting point. What makes a game tricky is that runners must carry the ball between their knees and then waddle to the turning point where the box is located to drop their egg. They then run back to the starting line to the next person who places a ball between their legs and repeats the process. This game can be played using one ball per team, if the child removes the “egg” and brings it back to the next person.

14. Vaseline Nose Race -Each player has a dab of Vaseline put down their nose. The first person also has a cotton ball placed there which is passed from person to person until the end of the line. No hands are allowed in this silly game as the cotton ball is passed nose to nose. The winning team is the one that successfully passes the cotton ball to the end of the line. (If the cotton ball falls off or gets too messy, the race coordinators can replace it.)

15. Newspaper Press – Team members are paired up and charged to run to the finish line with a single newspaper page between them. By carefully running in tandem, runners can make their goal. If the pair drops their newspaper page, they must go back to the starting line, and begin again. There are no hands allowed until it is time to handle the newspaper page to the next pair of runners. The winning team has all their pairs successfully complete the race.

16. Three Legged Race – After dividing the teams into pairs of players who are about the same height, have them stand side-by-side so that you can tie their adjacent legs together with a scarf or piece of cloth. Each pair of players runs to a designated point and back again so that they can tag the next pair. If a pair falls down while they are running, the last keep their legs tied together as they get up. The team that has all their pairs complete the race is the winner.

17. Statue of Liberty Relay – Lineup two teams and give the first person in line a plunger that they have to fill with water from a pool or bucket and run it to a designated turning point without losing the water. The returning runner hands the plunger off to the next person who refills it before beginning the run.

18. Chicken Stir Fry – This game requires a hula hoop, two rhythm sticks, and numerous rubber chickens or animals for each team. Players start by standing in front of their hula hoop that has the two sticks in it. The first player picks up the stairs and runs to the pile of animals. He or she picks up the animal with the stairs and runs back to drop it inside the hula hoop. The game continues until time is called. The winning team is the one with the most animals in the hoop.

19. Wheelbarrow Relay – Divide two teams into pairs where one will be the wheelbarrow and the other the farmer. The wheelbarrow must get down on their hands while the farmer holds their feet in the air and walk to the turning point on their hands. At the turning point, the pair reverses role so that the wheelbarrow becomes the farmer and vice versa. The first team that gets every pair to complete the process wins the game.

20. Hoop It Up – Teams of players stand in a circle with their hands joined. One person has a hula on their right arm. When the relay starts, the player steps for the group so that it rests on the opposite arm and then slides it to the right arm of the person to the left. The object of the game is to have passed the around the circle without dropping. First team to complete the process wins the game.

After you have looked at these popular relays, you may think of some that you enjoy organizing your student. Please comment below on what the kids that you work with enjoy. Have you have found any that work well with students with disabilities?